Get Started
Thanks for purchasing Agent Hub Application
Please read the documentation carefully, and if you have any questions, please feel free to contact us. Most pages are accompanied by a video tutorial, it's recommended to check both, the video and the written Documentation.
Must Read this:
After purchase, To get Download AgentHub project Zipit is suggested to setup the AgentHub Project to following these steps:
- Download the AgentHub project Zip
- To Extract the Zip
- In these AgentHub project Both folder frontend and Backend open in Vs-Code to run these project
Install Vs Code
To start these project,you need to Vs Code for your platform (Windows, macOS and Linux).
Visual Studio Code is a lightweight but powerful source code editor which runs on your desktop and is available for Windows, macOS and Linux. It comes with built-in support for JavaScript, TypeScript and Node.js and has a rich ecosystem of extensions for other languages and runtimes (such as C++, C#, Java, Python, PHP, Go, .NET). Begin your journey with VS Code
Install Node Js
In order to start configuration, you need to install Node js and NPM. First download the Node js and NPM from here Node and NPM
Install Next js on Window
First, you need to download the Windows Installer (.msi) file from the official Node.js website. This MSI installer database carries a collection of installer files essential to install, update, or modify the existing Node.js version.and more information visit onhttps://kinsta.com/blog/how-to-install-node-js/
Notably, the installer also carries the Node.js package manager (npm) within it. It means you don’t need to install the npm separately.
When downloading, select the correct version as per your operating system. For example, if you’re using a 64-bit operating system, download the 64-bit version, and if you’re using the 32-bit version, download the 32-bit version:
Once you open and run the .msi file, the installation process begins. But you have to set a few parameters before running the installation process. Double-click on the installer file and run it. The installer will ask you to accept the Node.js license agreement. To move forward, check the “I accept” box and click Next:
Then, select the destination where you want to install Node.js. If you don’t want to change the directory, go with the Windows default location and click the Next button again.
The next screen will show you custom setup options. If you want a standard installation with the Node.js default features, click the Next button. Otherwise, you can select your specific elements from the icons in the tree before clicking Next:
Node.js offers you options to install tools for native modules. If you’re interested in these, click the checkbox to mark your preferences, or click Next to move forward with the default:
Lastly — and this is the easiest part of all — click the Install button to begin the installation process:
So the installation process is completed. Now, you have to check whether Node.js is successfully installed or not.
- To verify the installation and confirm whether the correct version was installed, open your PC’s command prompt and enter the following command:
- Node --version
- And to check the npm version, run this command:
- npm --version
if the Node.js version and npm are correctly installed, you’ll see the version name in the CMD prompt.!
Install Next js on MacOS
As our first step, we need to actually get the official installer for Node.js on macOS. To do so, we can head over to the Node.js Downloads page to download the installer.and more information visit on https://kinsta.com/blog/how-to-install-node-js/
Follow these steps to get started:
You can get the macOS installer by clicking the Macintosh Installer option - this will download the .pkg installer for Node.js. Make sure you save it somewhere that you'll be able to access it!
Now that you've got the installer downloaded, you'll need to run it. The installer is a pretty typical interface - it won't take long to get through it (under a minute), even though there are a few parts to it. You can get through it by following the guide below:
- Introduction
- Select Continue
- License
- Select Continue
- Select Agree
- Installation Type
- Select Install
- Authenticate with your Mac to allow the Installation
- Select Install Software
- Summary
- Select Close
To verify that Node.js was installed correctly on your Mac, you can run the following command in your terminal:.
- node -v
Update Your npm Version
- $ sudo npm install npm --global
Start building with Node.js!
Install Next js on Linux
The Linux operating system works a bit differently than the other traditional operating systems. That’s because Linux is open-source, offering you more freedom, customization, and advanced functionalities. https://kinsta.com/blog/how-to-install-node-js/
If you’re casual with commands, you should feel comfortable with Linux. Here, we are about to discuss the easiest method of installing Node.js on the Linux operating system.
The Linux operating system has hundreds of different distributions because of the diversity it provides. And users love to customize and harness different versions’ specific functionalities using distinct distributions.
Firstly, find the installation instruction for your specific distribution from Node.js’s Binary Distributions page. For this guide, we’ll be using Ubuntu for illustration purposes.
- Install Curl Command Line Tool
- Before going for Node.js installation, ensure that you have the curl command-line utility installed on your system. If not, then paste this command on your terminal to install curl:
- sudo apt install curl
- It may ask for your system password to verify the permission of the installation. Once you input the password, the system should begin the curl installation.
- Password for codebind:
You need to copy and paste the Node.js installation command into your terminal (in our case, we can grab it from the Ubuntu distribution page) so that the system can begin the Node.js installation.
For instance, here, we’ll be installing Node.js v14.x. These are the installation commands for Ubuntu:
- Install Curl Command Line Tool
- curl -fsSL https://deb.nodesource.com/setup_14.x | sudo -E bash -
- sudo apt-get install -y nodejs
As you already have the curl command line installed on your terminal, you’ll need to copy and paste the first command (the curl command) on your terminal and run it.
These commands should display the version numbers for Node.js and npm, respectively.
The curl command begins the Node.js installation process, updates your system, and downloads all Node.js libraries required to install Node.js on your Linux OS.
- Copy and paste the second line of command from the installation instructions above into your Linux terminal:
- sudo apt-get install -y nodejs
As you’ve installed Node.js, you can verify to check whether the installation is successful or not. To confirm the installation, you need to run two simple Linux commands on your Linux terminal.
- To check the Node.js version, type:
- Node --version
- npm --version
Install React Js
In order to start configuration, you need to install Node js and NPM. First download the Node js and NPM from here Node and NPM
Install React js on Windows
In this section, we’ll guide you through the process of installing React on a Windows machine.
To publish and install packages to and from the public npm registry or a private npm registry, you must install Node.js and the npm command line interface using either a Node version manager or a Node installer. We strongly recommend using a Node version manager like nvm to install Node.js and npm. We do not recommend using a Node installer, since the Node installation process installs npm in a directory with local permissions and can cause permissions errors when you run npm packages globally.
Follow these steps to get started:
Before installing npm, you need to have Node.js installed on your system.
After the installation is complete, you can verify that Node.js and npm are installed by opening a command prompt and running the following commands:
- node -v
- npm -v
These commands should display the version numbers for Node.js and npm, respectively.
- To download the latest version of npm, on the command line, run the following command:
- npm i or npm install
Install React js on macOS
In this section, we’ll guide you through the process of installing React on a macOS machine.
As with the Windows installation process, you need to have Node.js and npm (Node Package Manager) installed on your macOS system as well. If you haven’t already installed them, follow these steps
Visit the Node.js download page
- Visit the Node.js download page
- Download the macOS installer
Once downloaded, click the .pkg file in your Downloads folder to run the installer
Follow the instructions that appear on your screen, including accepting the License Agreement, selecting the target destination for the installed files, and selecting the installation type.
After the installation is complete, you can verify that Node.js and npm are installed by opening a terminal and running the following commands:After the installation is complete, you can verify that Node.js and npm are installed by opening a command prompt and running the following commands:
- node -v
- npm -v
These commands should display the version numbers for Node.js and npm, respectively
Alternatively, you can install Node.js and npm via the command line. To do this, open Terminal then input:
- brew install node
Wait for the installation to complete then verify its installation in the same way as above, by entering:
- node -v
- npm -v
These commands should display the version numbers for Node.js and npm, respectively.
- To download the latest version of npm, on the command line, run the following command:
- npm i or npm install
Install React js on Linux
In this section, we’ll guide you through the process of installing React on a Linux machine.
Follow these steps to get started:
If you have a Linux-based system, you’ll want to follow this set of steps to install React:
- sudo apt install npm
After the installation is complete, you can verify that Node.js and npm are installed by opening a command prompt and running the following commands:
- npm --version
- node --version
These commands should display the version numbers for Node.js and npm, respectively.
- To download the latest version of npm, on the command line, run the following command:
- npm i or npm install
Install Mongodb
MongoDB is an open-source document database that provides high performance, high availability, and automatic scaling.
Download Compass
https://www.mongodb.com/docs/compass/current/install/#download-compass- Open the Download page.
- Select the installer you prefer. The MongoDB Compass installer is available as a .exe or .msi package or a .zip archive..
- Download the latest version of MongoDB Compass for Windows.
Install Mongodb on Windows
Compass requires:
- 64-bit version of Microsoft Windows 10 or later.
- MongoDB 4.2 or later.
- The Compass installer prompts you to install the minimum required version of the .NET framework if it is not already installed on your system.
- Starting the installation as an administrator if you are running a silent installation using Microsoft PowerShell or installing on Azure Virtual Desktop Infrastructure (VDI).
Install Compass:
- Double-click the installer file
- Once installed, Compass launches and prompts you to configure privacy settings and specify update preferences
Create a MongoDB Atlas cluster
you will need a MongoDB database instance. If you don’t have one at hand, you can create a free cluster in MongoDB Atlas. Follow these steps to create and connect to a cluster:
- Create an Atlas account
- Add your connection IP address to your IP access list
- Create a database user for your cluster
- Connect to your cluster
Connect to Your Cluster
- Now that we have a cluster, we can connect to it. It’s considered a good practice to keep your connection string and credentials separate from your code. You can do that by creating a configuration file that’s not checked into revision history. Create a “.env” file at the root of your project and add your cluster connection string as a variable:
- DB_URI=mongodb+srv://
: @ .mongodb.net/
- DB_URI=mongodb+srv://
Next, create a new directory “src” in your project and a new “.env” file in it. To do that, you can run you project :
Then, we need to use the variables from the “.env” file into process.env. Once we’ve done that, we can log the connection URI to make sure the configuration is loaded correctly.
Install Mongodb on MacOs
Compass requires:
- 64-bit version of macOS 10.12 or later..
- MongoDB 4.2 or late.
- Starting the installation as an administrator if you are running a silent installation using Microsoft PowerShell or installing on Azure Virtual Desktop Infrastructure (VDI).
Download the latest version of MongoDB Compass for macOS. The MongoDB Compass installer is a .dmg disk image.
Install Compass:
- Once you have downloaded Compass, double-click on the .dmg file to open the disk image within the macOS Finder
- Drag the MongoDB Compass application to your Applications folder.
- Eject the disk image..
- From the Applications folder, double-click on the Compass icon to start the application.
- When you open MongoDB Compass for the first time, you may receive a notice stating that it is an application downloaded from the internet, requiring you to confirm you want to open it. Click Open to continue and launch Compass.
Create a MongoDB Atlas cluster
you will need a MongoDB database instance. If you don’t have one at hand, you can create a free cluster in MongoDB Atlas. Follow these steps to create and connect to a cluster:
- Create an Atlas account
- Add your connection IP address to your IP access list
- Create a database user for your cluster
- Connect to your cluster
Connect to Your Cluster
- Now that we have a cluster, we can connect to it. It’s considered a good practice to keep your connection string and credentials separate from your code. You can do that by creating a configuration file that’s not checked into revision history. Create a “.env” file at the root of your project and add your cluster connection string as a variable:
- DB_URI=mongodb+srv://
: @ .mongodb.net/
- DB_URI=mongodb+srv://
Next, create a new directory “src” in your project and a new “.env” file in it. To do that, you can run you project :
Then, we need to use the variables from the “.env” file into process.env. Once we’ve done that, we can log the connection URI to make sure the configuration is loaded correctly.
Install Mongodb on Linux
Compass requires:
- 64-bit version of Ubuntu 14.04 or later..
- MongoDB 4.2 or late.
- To download and install MongoDB Compass, select your operating system:
Select the appropriate tab based on your Linux distribution and desired package from the tabs below:.
- To install the .deb package on Ubuntu and Debian, click the .deb tab.
- To install the .rpm package on RHEL, click the .rpm tab.
- Download MongoDB Compass:
- wget https://downloads.mongodb.com/compass/mongodb-compass_1.40.4_amd64.deb
- Start MongoDB Compass:
- mongodb-compass
- Download MongoDB Compass:
- wget https://downloads.mongodb.com/compass/mongodb-compass_1.40.4_amd64.deb
Install Compass:
- Once you have downloaded Compass, double-click on the .dmg file to open the disk image within the macOS Finder.
- Drag the MongoDB Compass application to your Applications folder.
- Eject the disk image..
- From the Applications folder, double-click on the Compass icon to start the application.
- When you open MongoDB Compass for the first time, you may receive a notice stating that it is an application downloaded from the internet, requiring you to confirm you want to open it. Click Open to continue and launch Compass.
Create a MongoDB Atlas cluster
you will need a MongoDB database instance. If you don’t have one at hand, you can create a free cluster in MongoDB Atlas. Follow these steps to create and connect to a cluster:
- Create an Atlas account
- Add your connection IP address to your IP access list
- Create a database user for your cluster
- Connect to your cluster
Connect to Your Cluster
- Now that we have a cluster, we can connect to it. It’s considered a good practice to keep your connection string and credentials separate from your code. You can do that by creating a configuration file that’s not checked into revision history. Create a “.env” file at the root of your project and add your cluster connection string as a variable:
- DB_URI=mongodb+srv://
: @ .mongodb.net/
- DB_URI=mongodb+srv://
Next, create a new directory “src” in your project and a new “.env” file in it. To do that, you can run you project :
Then, we need to use the variables from the “.env” file into process.env. Once we’ve done that, we can log the connection URI to make sure the configuration is loaded correctly.
Start-project
In Vs-Code both frontend and backend project folder will be open in new tab and both terminal will be open for run commands
Front-End
Once the project is setup, head over to the project directory by running the following command in the command prompt:
- npm start
This command launches the development server, which watches for changes to your project files and automatically reloads the browser when changes are detected.
A new browser window should open with your React application running at http://localhost:3000/ that looks like this:
Above illustration demonstrates the process to start the project of Frontend.
Congratulations! You have successfully run React project on your machine. You can now begin building your user interfaces with React.
Back-End
Once the project is setup, head over to the project directory by running the following command in the command prompt:
- npm run dev
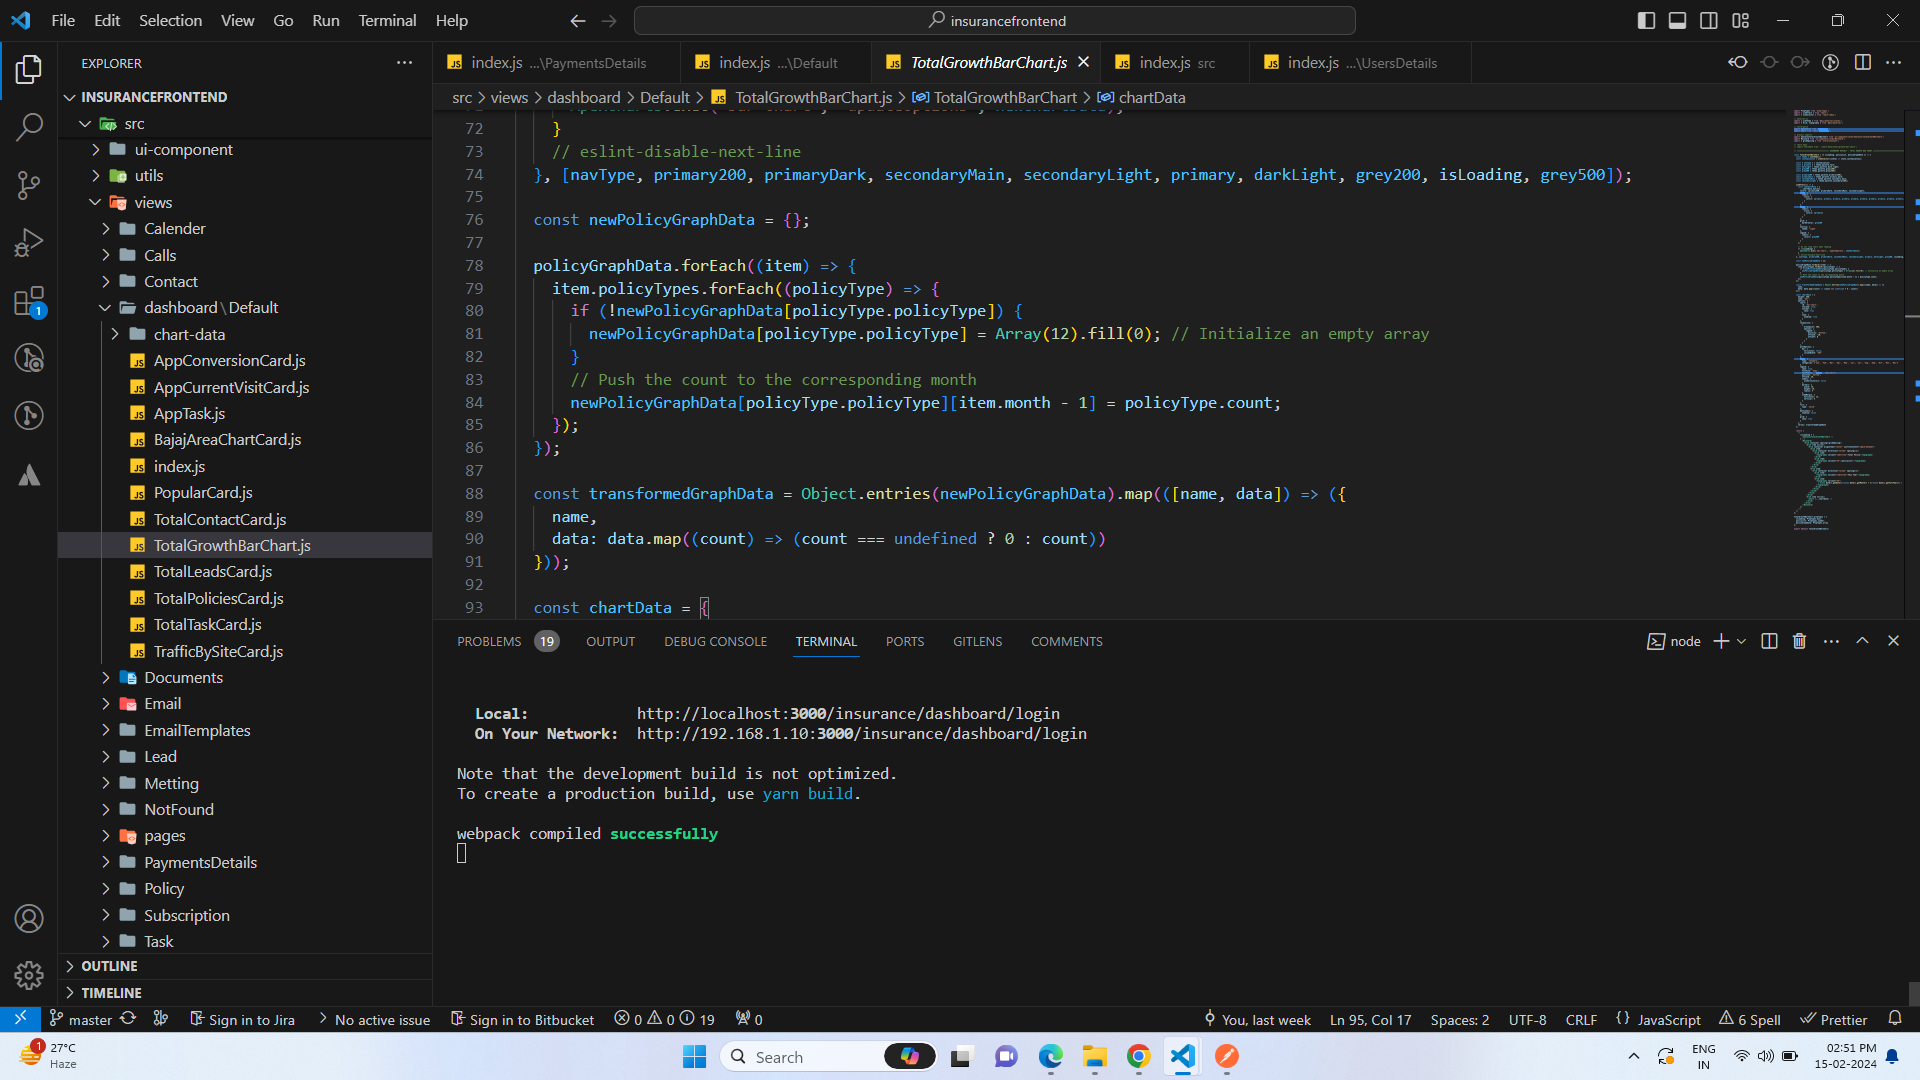
In terminal backend code running on port at http://localhost:4000/ that looks like this:
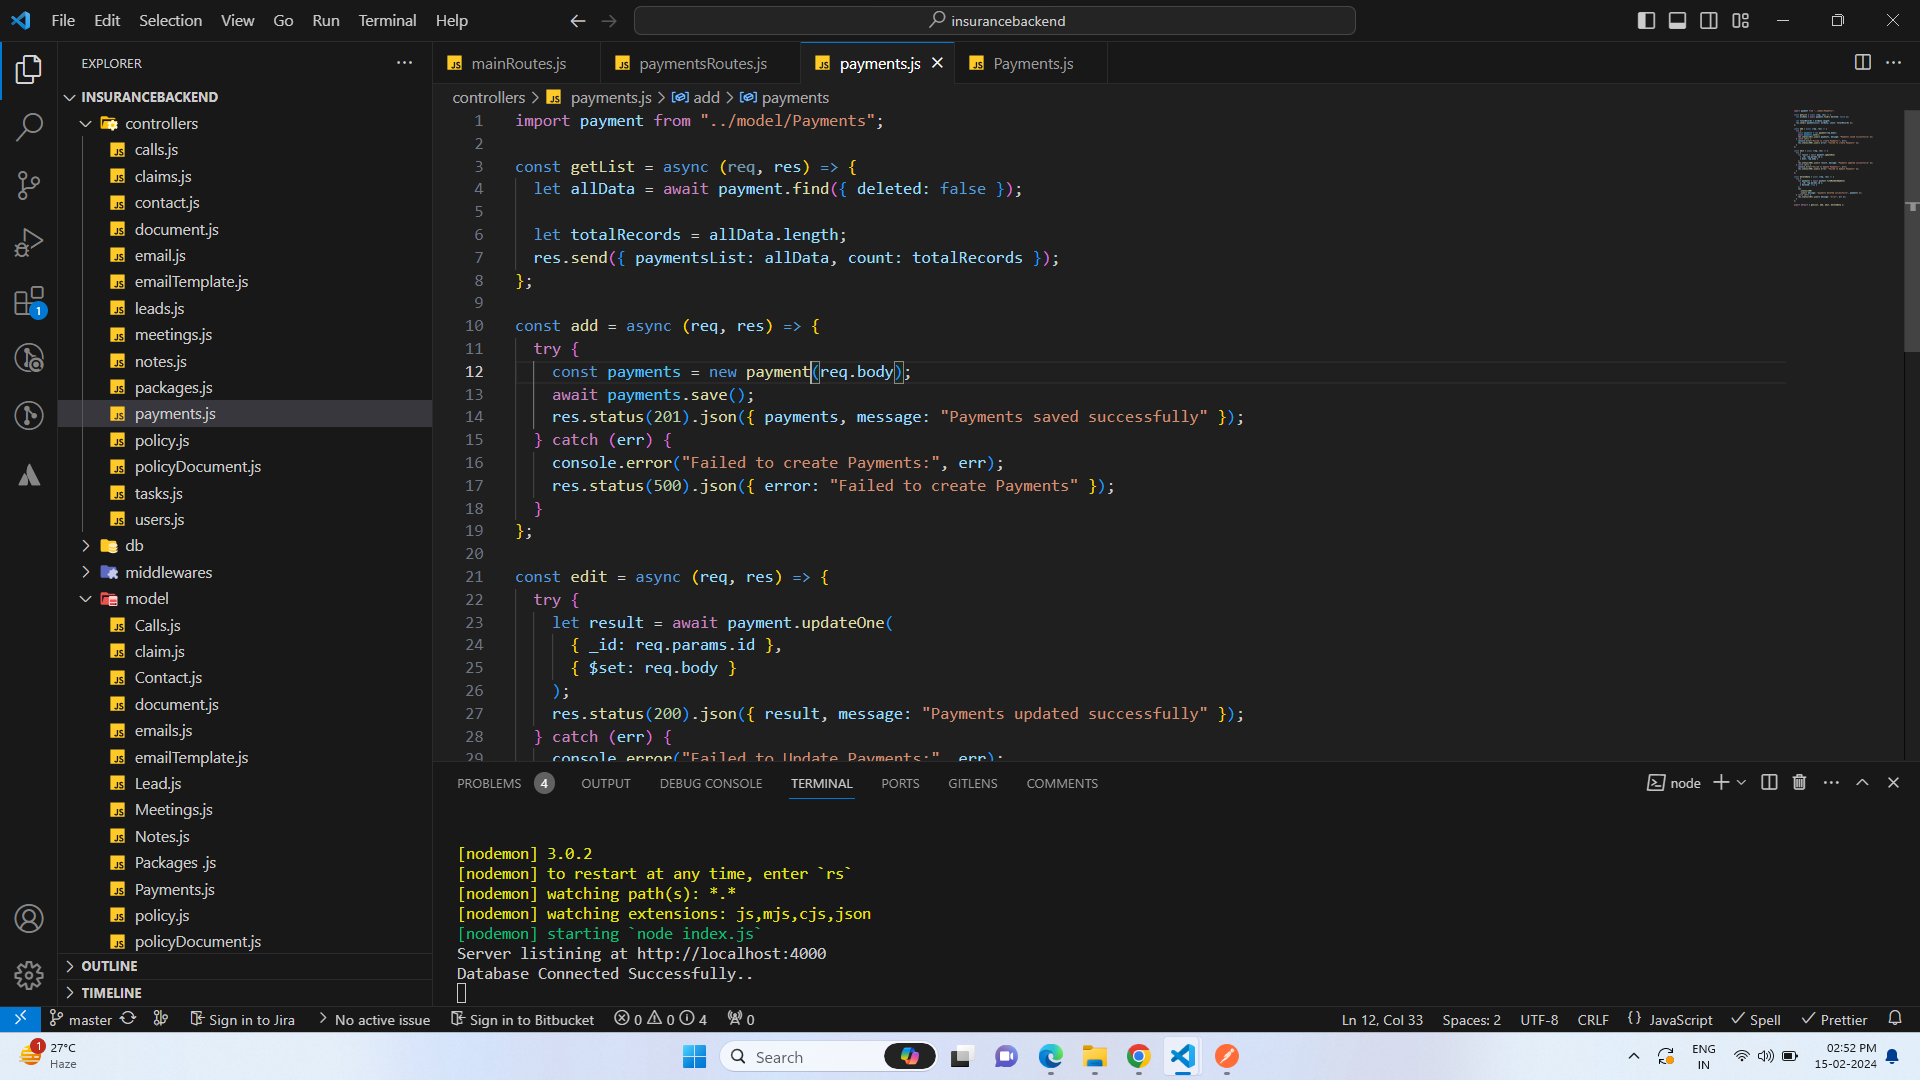
Above illustration demonstrates the process to start the project of Backend.
DashBoard View
After the successfully login,then redirect Dashboard Ui
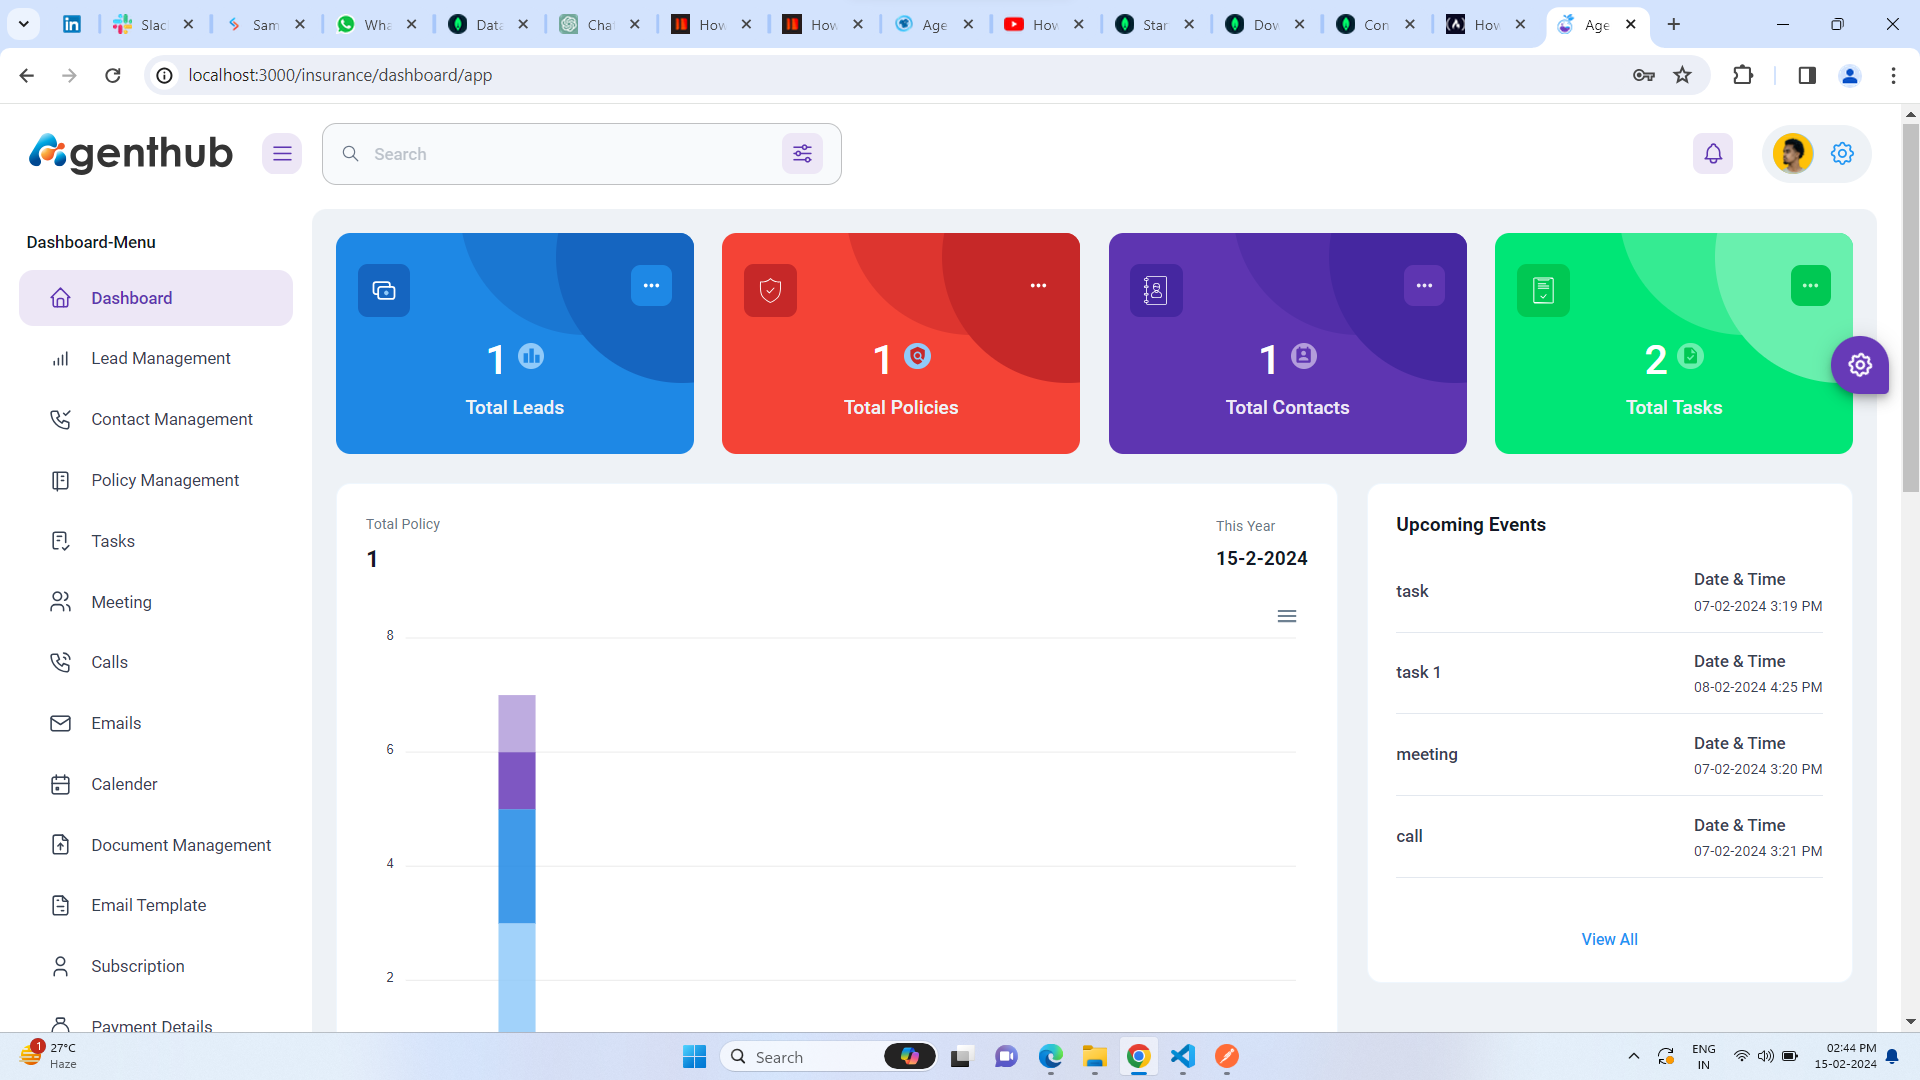
Above illustration demonstrates the project of dashboard Ui.
Change App Title Name
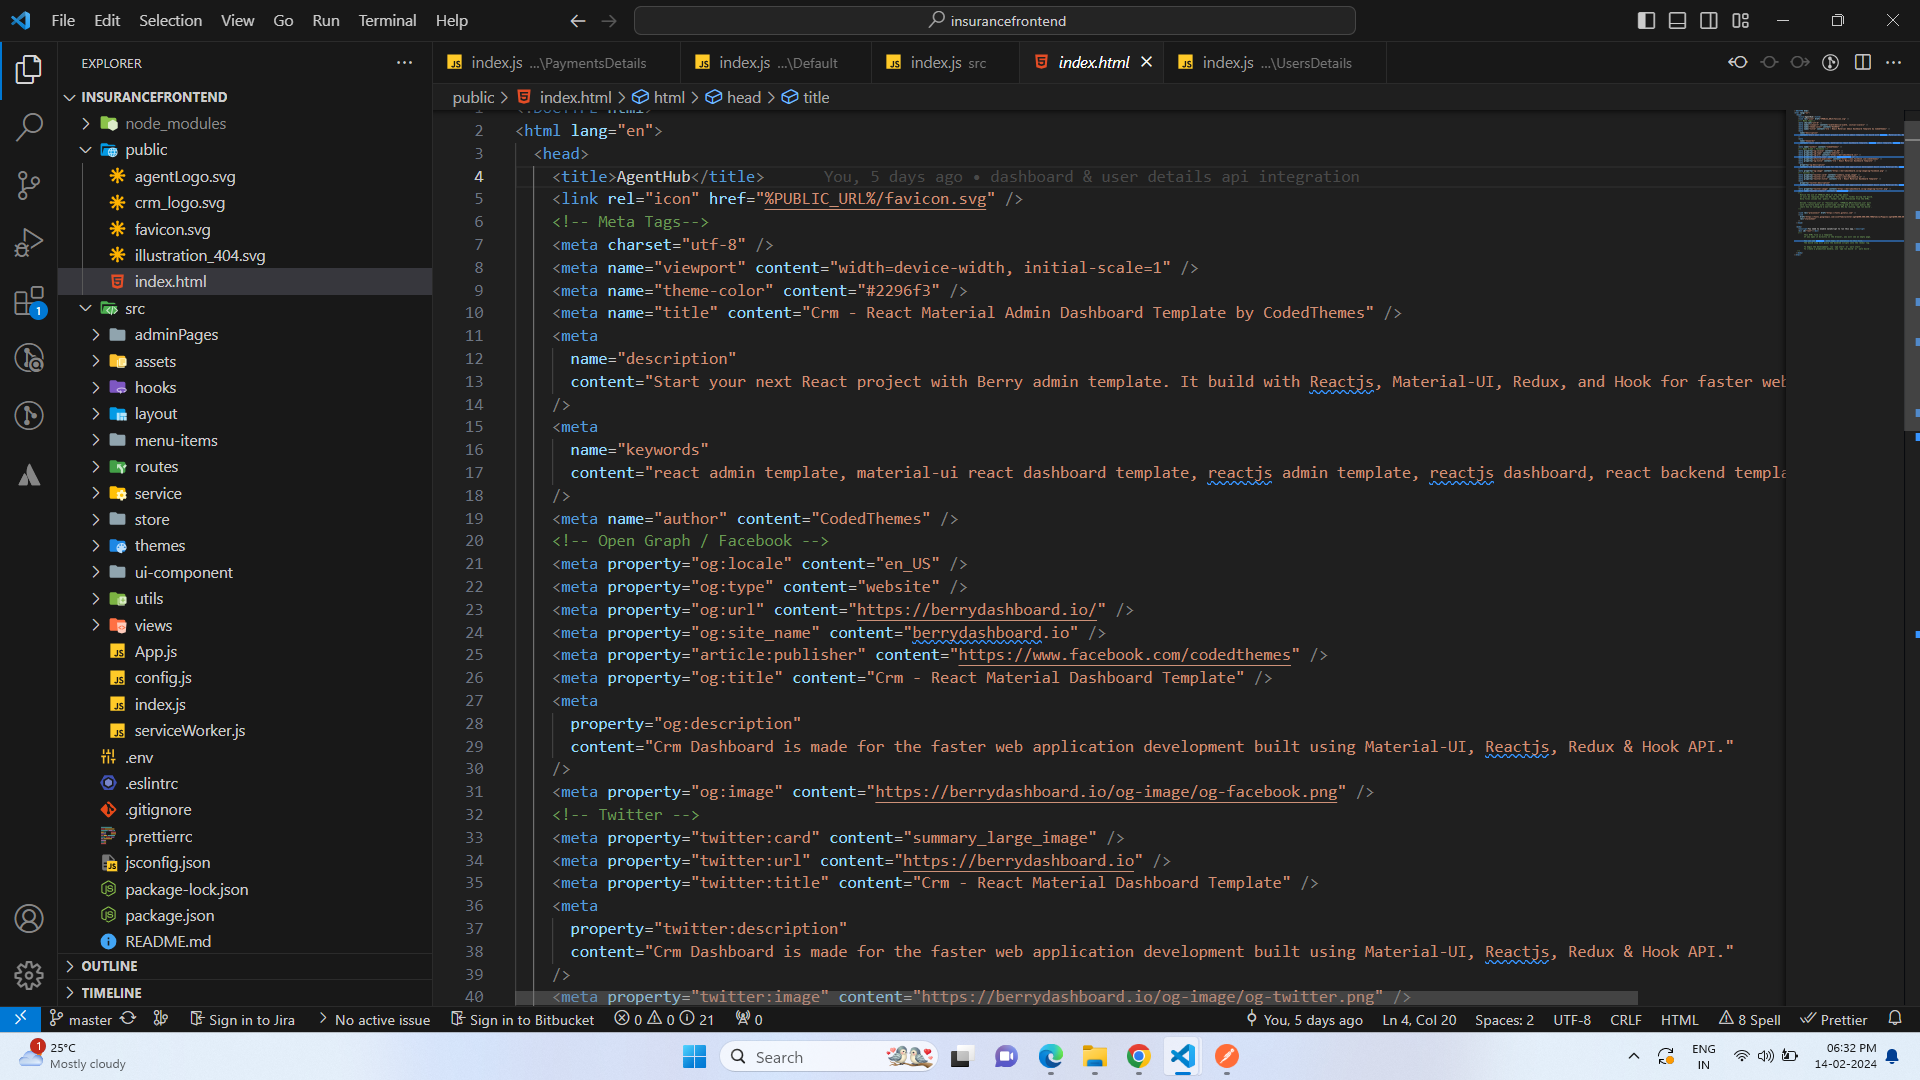
Above illustration demonstrates the process to change the name of application.
Change App Logo
if you want to change logo of these project go to LogoSection index.js file,In these file go to line 24 and keep image in public/image folder and change the logo of these application
Above illustration demonstrates the process to change the Logo of application.
Change App Menu
if you want to change name of menu go to title option and change the title on particular screen
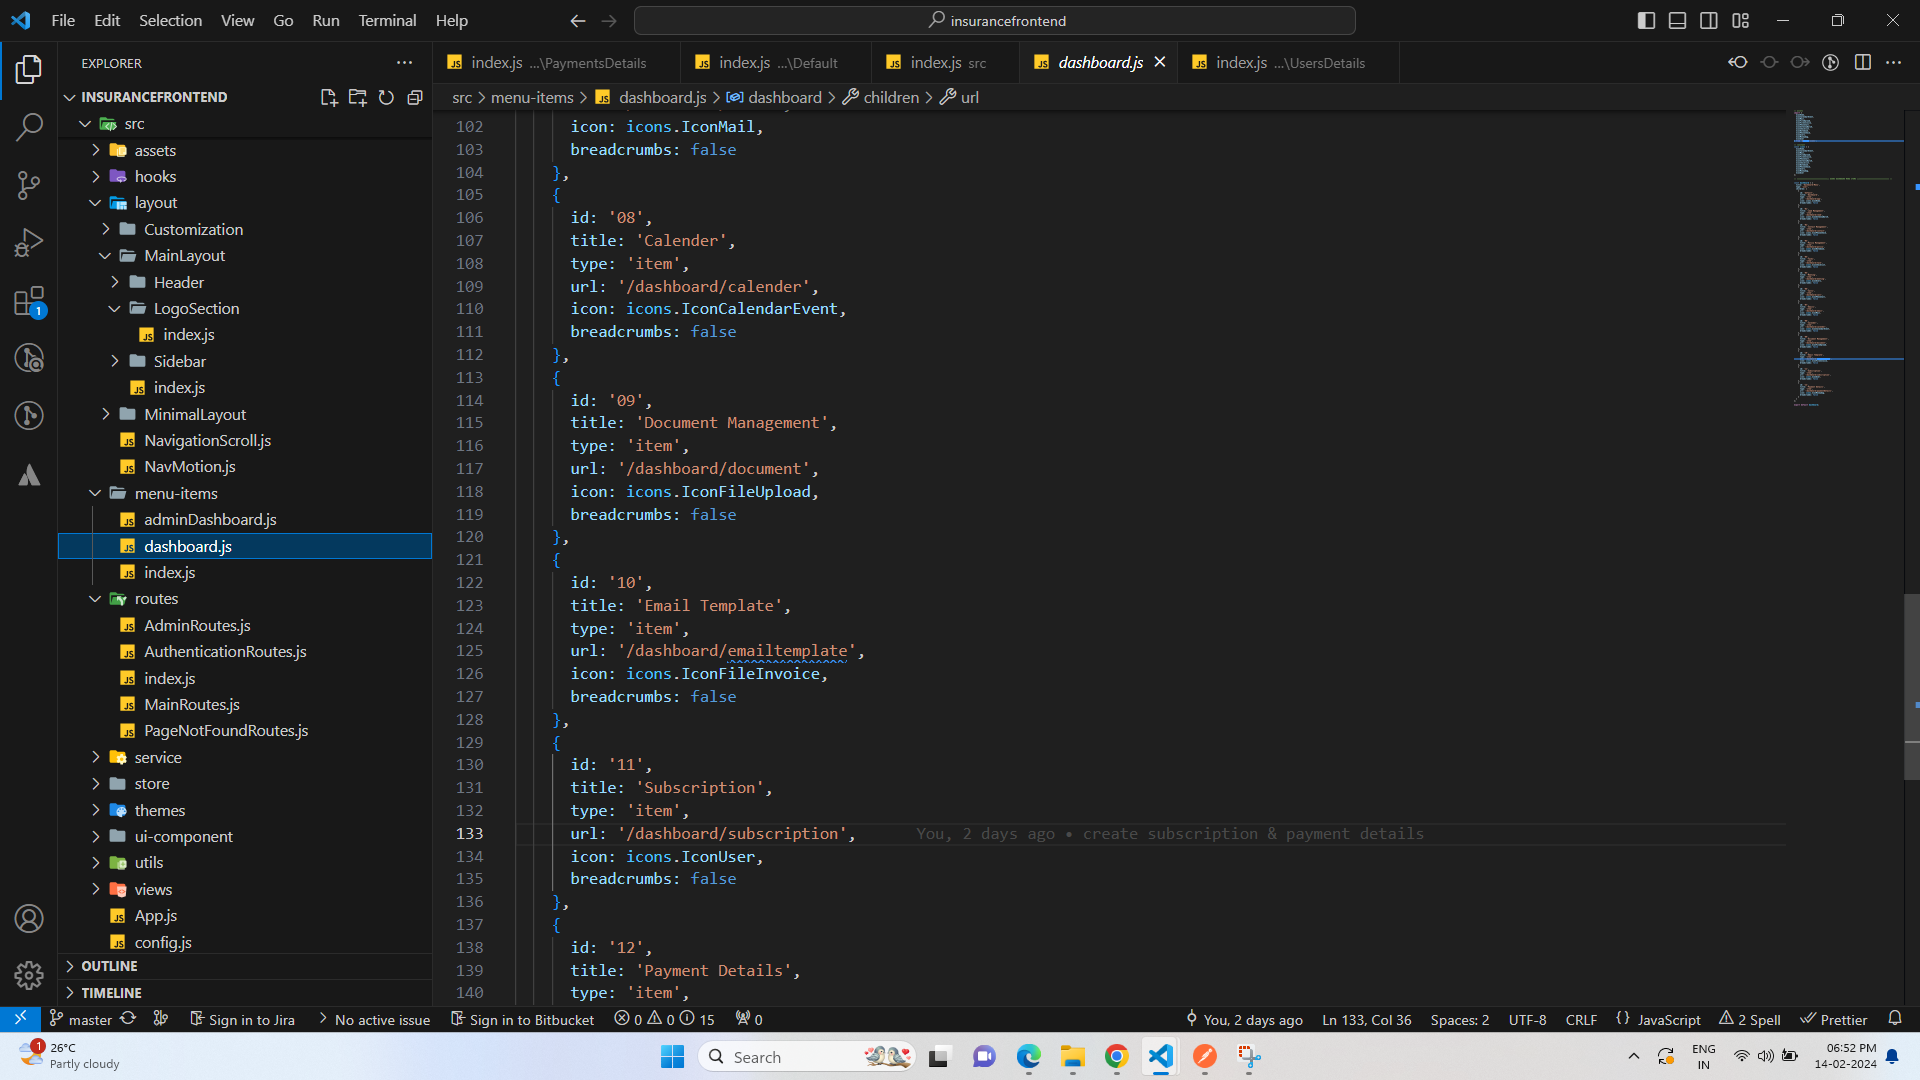
Above illustration demonstrates the process to change the Menu of application.
Change App Routing
if you want to change url of routing go to path option and change the path of routing on particular screen
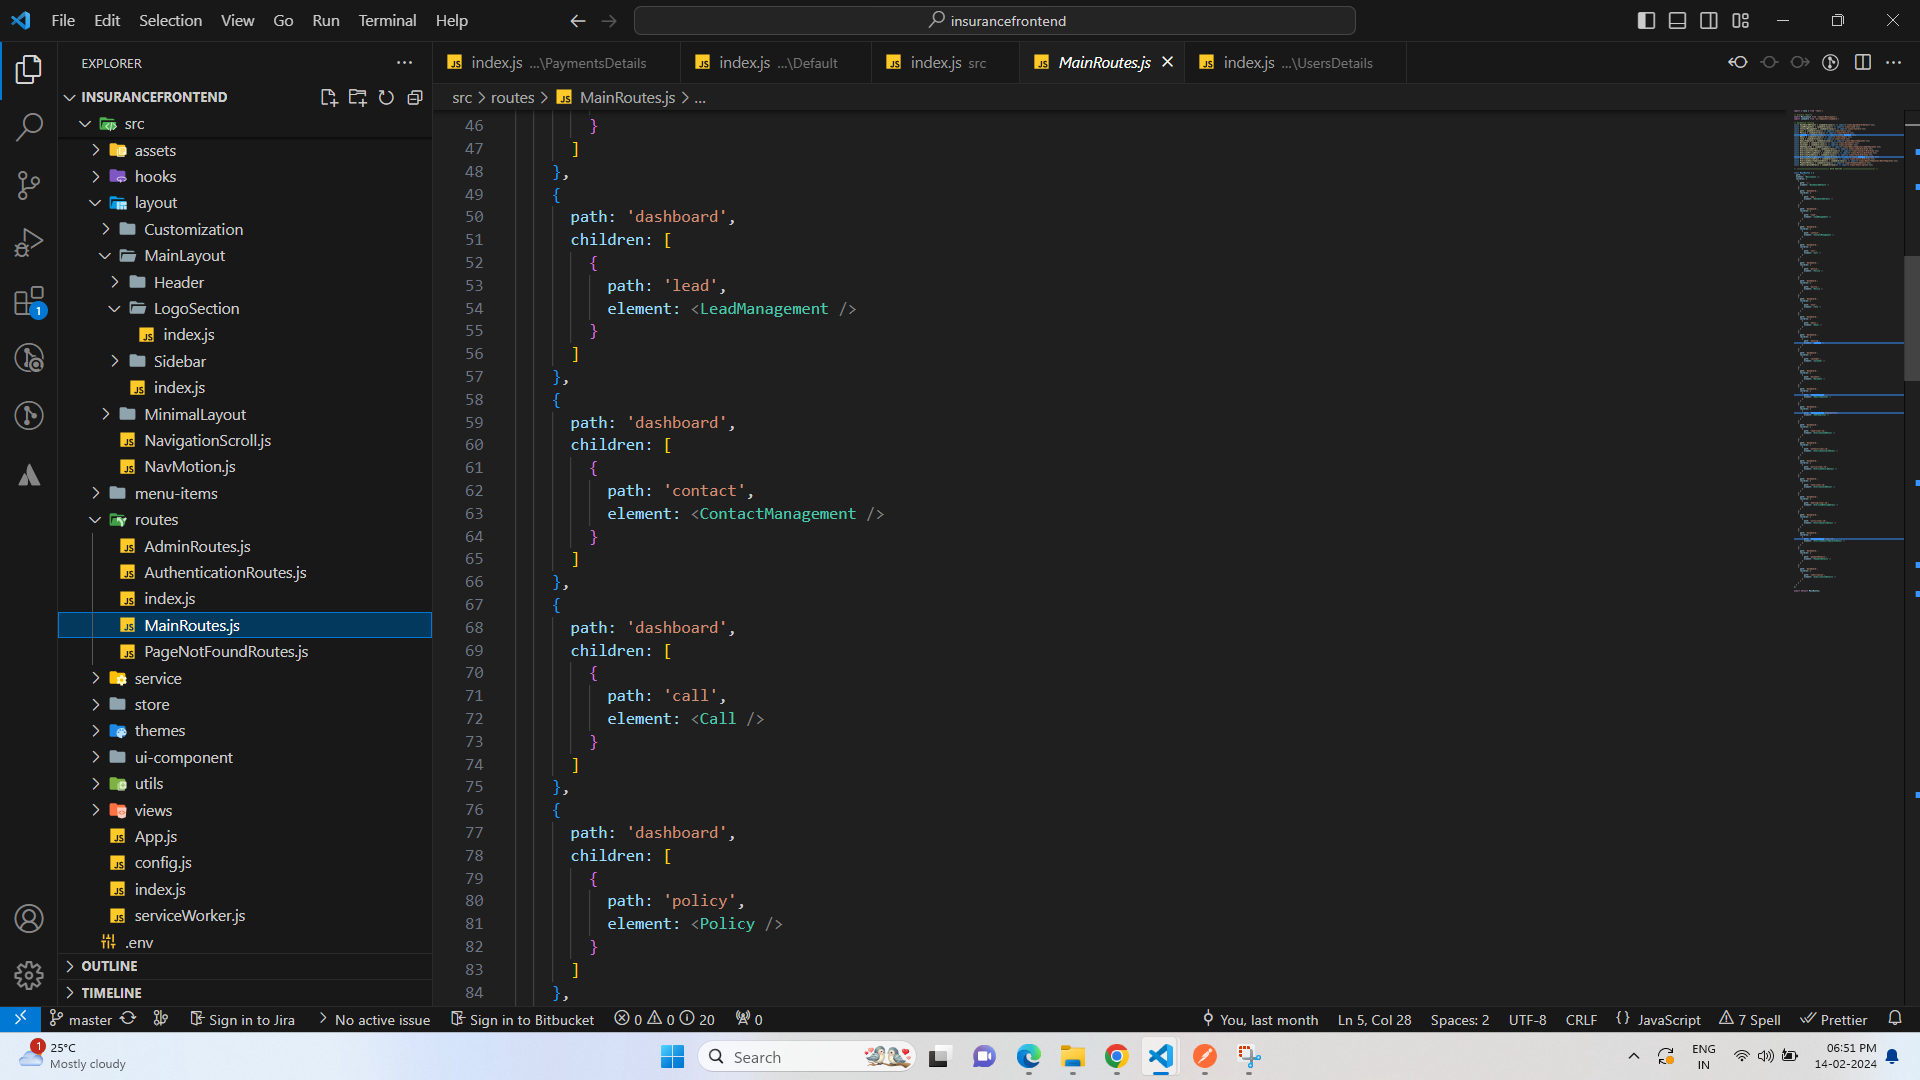
Above illustration demonstrates the process to change the Routing of application.
Error
- Input Errors:
- Information provided by the user is unacceptable for some reason. This includes errors from form validation, duplicate actions, uniqueness issues, resources not found, etc.
- Authorization Errors:
- A user is attempting to perform an action to which he/she does not have permission
- Availability Errors
- A resource that is needed to complete the user's action is unavailable for some reason. This may be expected (scheduled maintenance) or unexpected (server crash!).
- Unexpected Errors:
- These are errors that likely indicate a bug in the application, such as unhandled exceptions.
And More information go to the Frontend folder README.md file and Read more information to these projects